In the simple example that we describe in Coding a Greyscale Image, we created pixel art of the letter F for which we needed to fill in each cell one at a time. Creating images in this way can be tedious. We will now show a different method using freeform drawing.
Drawing
This is done using Excel’s drawing tools. To access these tools, select Draw > Drawing Tools|Highlighter. This tool will draw in greyscale in the manner of a felt-tip pen. We draw the number 8 using the middle pen thickness as shown in Figure 1.
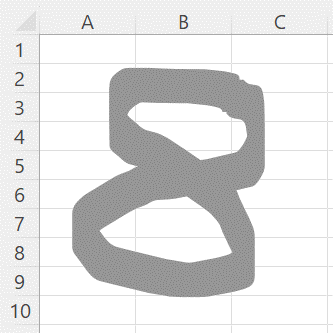
Figure 1 – Freeform version of eight
Pixel Art Add-in
Things would be easy if the grey area changed the fill color of the cells where the image is present. Unfortunately, this is not the case. Fortunately, we can use a Pixel Art add-in to accomplish this. This app was created by Digital Inspiration and is available for free for use with Excel.
We downloaded and installed the Pixel Art add-in with access via the Home ribbon on Excel.
We now show how to make the image from Figure 8, or any other greyscale image, into pixel art. First, right-click on the image and select the Save Picture option from the pulldown menu, saving this image with the name eight.png. Next, we select Home > Utilities|Pixel Art, which results in the Pixel Art interface appearing on the right side of the Excel spreadsheet, as shown in Figure 2.
![]()
Figure 2 – Pixel Art interface
After clicking on the Upload a file prompt and supplying the name, eight.png, of the image, Pixel Art fills in the cells of the spreadsheet with the image. This is shown in Figure 3, where only the top part of the image is displayed.
![]()
Figure 3 – Pixel Art image
The image fills in range B2:DZ161 where each cell has been reduced automatically to 16 × 16 pixels in size. This range is 160 cells in height and 130 cells in width (since =COLUMN(DZ161) returns 130).
Scanning and compressing the image
We can now use the Scanning an Image data analysis tool to create the codes for this image as a 28 × 28 cell range, as described in Coding an Image Tools. To do this, we fill in the dialog box as shown in Figure 2 of Coding an Image Tools using B2:DZ161 as the Input Range. Figure 4 displays the coding of the compressed image.
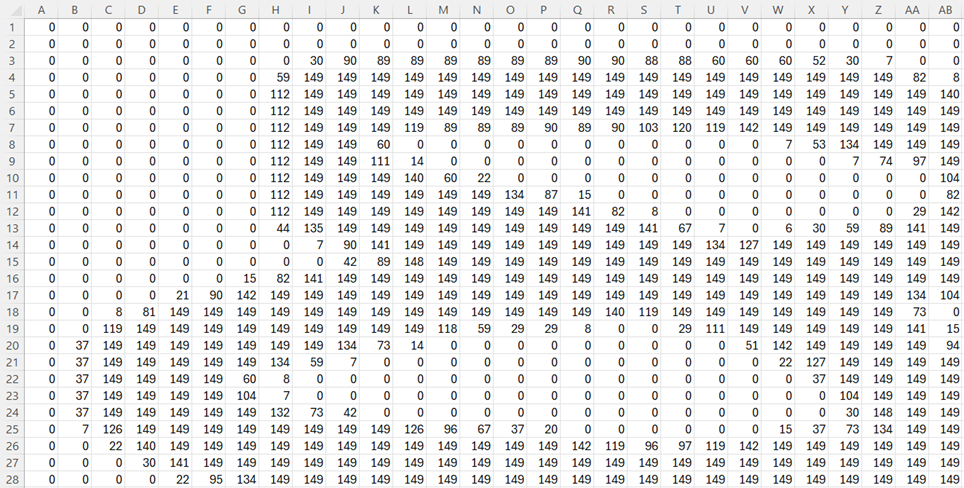
Figure 4 – Coding the compressed image
The output in range A1:AB28 of Figure 4 can also be obtained via the array formula
=CodeImage(B2:DZ161,28,28,,FALSE)
as explained in Compressing an Image.
Painting the Image
Note that Pixel Art always leaves row 1 and column A blank (i.e. white) and the image always occupies rows 2 through 161. The number of columns varies depending on the dimensions of the image.
We can now use the Painting an Image data analysis tool, inserting the range A1:AB28 from Figure 4 in the Input Range field of the dialog box shown in Figure 4 of Coding an Image Tools, setting the Pixel size to 8, and clicking on the One Image and Greyscale options. The resulting image is shown in Figure 5.
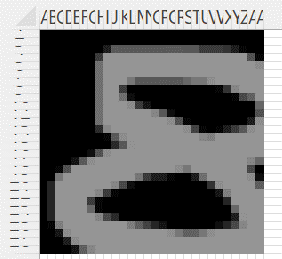
Figure 5 – Compressed image of 8
We see that the image in Figure 5 is truncated a bit. If this is a problem, then we might need to change the shape of the original drawing of the image or change the Height and Width parameters.
Examples Workbook
Click here to download the Excel workbook with the examples described on this webpage.
References
McCaffrey, J. (2020) Displaying a grayscale image using Excel cells
https://jamesmccaffrey.wordpress.com/2020/05/11/displaying-a-grayscale-image-using-excel-cells/
Dynamsoft (2019) Image processing 101 chapter 1.3: color space conversion
https://www.dynamsoft.com/blog/insights/image-processing/image-processing-101-color-space-conversion/
Wikipedia (2024) Grayscale
https://en.wikipedia.org/wiki/Grayscale
Digital Inspiration (2024) Pixel Art
https://appsource.microsoft.com/en-us/product/office/wa200006113?tab=overview